Following on from my post from last week about introducing Computational Thinking in the junior classroom, here are some thoughts on where to start for teachers of Upper Primary and Intermediate School.
Like for the juniors, I would always start with the teachers understanding the revised curriculum content. With that I mean not just the Progress Outcome that might appear to be aligned with the CL most of your students are working on, but Progress Outcomes 1 - 5 as their alignment against curriculum levels is subject is still tentative. My previous blog post contains suggestions where you can get help with this - or you might want to start as simple as carefully reading the PO descriptions, noting down similarities and differences between the different levels and work out unfamiliar terms (and there is lots of jargon built into these brief paragraphs...).
Again, it really important that you acquire a basic understanding of coding, it is another form of literacy that our students need to become familiar with. As I said in my post last week, I personally like https://code.org/, it has given me a good starting point in block coding which in my opinion is all that you need to know about for this age group. From there, familiarise yourself with Scratch (if that is the platform you choose to use with your students).
At this age I would still start the students off with unplugged activities to get them thinking 'like a computer', just add a layer of complexity to it in comparison to the juniors. CS Unplugged is a great source of ideas.
One of the activities we do in Raranga Matihiko at Waitangi is based on an idea we first saw facilitated by Rosalie Reiri at a Kia Takatū workshop: Programming a tohu to move across a grid to a selected destination with the instruction to get there as fast as possible = using as few lines of code as possible.
We use a clear plastic sheet with a grid drawn on it (greenhouse plastic from your garden centre) and students move tokens of your choice to the destination they have chosen, only using the instructions of 'move forward', 'turn left' and 'turn right'. They are encouraged to use iteration/repeat such as 'move forward x5'. For this age group we add a second priority: While you move across the grid as fast as possible, collect as much money as you can -> in case of a draw between different players in the end, the person with the most money will win. OR you can make any variation of this and other ideas you have to get their brains thinking 'like a computer'.
While code.org have a lot of interesting pre-set courses, for this age group I would straight move them to a a platform like Scratch. Start with a good 'tutu', let them figure out what they can do on there. Here are some ideas for you:
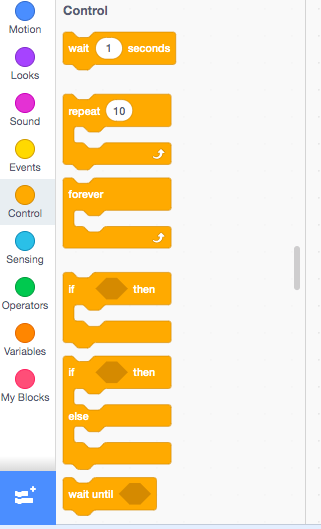
Suitable code blocks to start with include:
Remember that the code is always attached to a particular Sprite (if you delete the Sprite, your code is gone! I suggest you teach your students to take screenshots periodically so they have a copy just in case). Select the Sprite, then drag blocks from the left onto your workspace in the middle of the screen. Connect them together (just bring them close, they act like they are magnetic and attract each other). Ensure you always start with an event block, most commonly When green flag clicked:

One of the absolute must have blocks is go to x:___ y:____ (found under the motion blocks), it should be placed at the beginning of a project right under the event block that starts it all off. This ensures that the Sprite always starts in the same place.
Apply iteration and reduce the number of lines in a program:
There is a wide range of Backdrops and Sprites students can use for their projects, but here at Waitangi we prefer students to create their own.


While we tend to create Backdrops and Sprites in other programs such as Paint 3D, Scratch includes tools to create your own (just select the brush you see above), or to edit existing ones (including your own uploads):
Costumes can help animate a project. Have a look at the subtle difference between these two projects:


Managing and sharing Scratch projects
For the Raranga Matihiko programme at Waitangi we currently work under just one account in Scratch which allows us to manage all student work. We place all projects for a class into one Studio (= folder), and we share the URL to the studio with the visiting teacher. For this we have to 'share' each project, make it publicly visible which is covered under our parent permission forms. I have turned commenting off for projects created under the WaitangiMuseum Scratch account because we don't have enough time to monitor all comments to all projects.
At this age I would still start the students off with unplugged activities to get them thinking 'like a computer', just add a layer of complexity to it in comparison to the juniors. CS Unplugged is a great source of ideas.
One of the activities we do in Raranga Matihiko at Waitangi is based on an idea we first saw facilitated by Rosalie Reiri at a Kia Takatū workshop: Programming a tohu to move across a grid to a selected destination with the instruction to get there as fast as possible = using as few lines of code as possible.
We use a clear plastic sheet with a grid drawn on it (greenhouse plastic from your garden centre) and students move tokens of your choice to the destination they have chosen, only using the instructions of 'move forward', 'turn left' and 'turn right'. They are encouraged to use iteration/repeat such as 'move forward x5'. For this age group we add a second priority: While you move across the grid as fast as possible, collect as much money as you can -> in case of a draw between different players in the end, the person with the most money will win. OR you can make any variation of this and other ideas you have to get their brains thinking 'like a computer'.


While code.org have a lot of interesting pre-set courses, for this age group I would straight move them to a a platform like Scratch. Start with a good 'tutu', let them figure out what they can do on there. Here are some ideas for you:
Suitable code blocks to start with include:


Remember that the code is always attached to a particular Sprite (if you delete the Sprite, your code is gone! I suggest you teach your students to take screenshots periodically so they have a copy just in case). Select the Sprite, then drag blocks from the left onto your workspace in the middle of the screen. Connect them together (just bring them close, they act like they are magnetic and attract each other). Ensure you always start with an event block, most commonly When green flag clicked:

One of the absolute must have blocks is go to x:___ y:____ (found under the motion blocks), it should be placed at the beginning of a project right under the event block that starts it all off. This ensures that the Sprite always starts in the same place.
Apply iteration and reduce the number of lines in a program:
 |
| Both of these algorithms do exactly the same thing... |
 |
| ... but this one uses fewer lines of code = less chance to make a mistake while writing the program |
There is a wide range of Backdrops and Sprites students can use for their projects, but here at Waitangi we prefer students to create their own.


While we tend to create Backdrops and Sprites in other programs such as Paint 3D, Scratch includes tools to create your own (just select the brush you see above), or to edit existing ones (including your own uploads):
 |
| Click on the Sprite you want to edit (highlighted in blue here at the right), then select the second tab Costumes at the top to make changes to the way your Sprite looks or to create additional costumes for your Sprite |
 |
Click on Stage instead of a Sprite and the second tab at the top becomes Backdrops.
Handy hint: Look at Stage, the number under Backdrops indicates how many different backdrops are loaded into the project. You might want to delete backdrops that are not needed or are duplicates.
|
Costumes can help animate a project. Have a look at the subtle difference between these two projects:
Hiding and showing different Sprites can have its own little challenges: Anytime you use a hide block in your code, you also need to include a show block. While this might seem counter-intuitive to you, it makes sense in computational thinking: Imagine playing hide and seek with a robot, and you tell the robot to hide. Unlike our students it won't get bored or hungry and come out anyway, it will hide forever UNLESS you tell it to show.

Timing can be very important; if your students are writing more complex code where something new happens after a particular event, or after a certain amount of time, look at broadcast message.

Found under events, broadcast message can set in motion a new sequence of events:
 |
| As you can see, the workspace can include more than one sequence of code: On the left the command for the mouse to hide at a certain place as soon as the green flag is clicked. On the right, after receiving the message which I named Chase mouse it will show itself and forever move around the screen randomly. |
 |
On the left, the original code with a broadcast message block added at the bottom (to create a new message, just click on the drop down arrow and name your message something that makes sense to you).
On the right I added a new sequence of code: Once the cat receives the message, it miaows once, then waits for one second before it glides towards the mouse forever.
Below that I added a third block of code, not currently connected to any event block. If I drag this into my forever block below glide to mouse my program will stop when the cat touches the mouse - and there is lots more you could add here.
|
Managing and sharing Scratch projects
For the Raranga Matihiko programme at Waitangi we currently work under just one account in Scratch which allows us to manage all student work. We place all projects for a class into one Studio (= folder), and we share the URL to the studio with the visiting teacher. For this we have to 'share' each project, make it publicly visible which is covered under our parent permission forms. I have turned commenting off for projects created under the WaitangiMuseum Scratch account because we don't have enough time to monitor all comments to all projects.
To embed a Scratch project into a blog as I have done here you can use the following code:
<iframe allowtransparency="true" width="485" height="402" src="https://scratch.mit.edu/projects/embed/308725885/?autostart=false" frameborder="0" allowfullscreen=""></iframe>
Instead of the yellow of the URL, add the number of the project you wish to embed.
Often students want to continue working on the projects they started with us so I encourage visiting teachers to set up their own class account or individual student Scratch accounts and use the Remix buttonto make a copy of the project in their own account:

This is also a good opportunity to reinforce Digital Citizenship, explore the ideas of Creative Commons as well as attributing where work comes from. Student might also be interested to explore other Scratch projects to learn from the code used there; however, I suggest you curate a selection of suitable projects (add them to a studio) so your students don't get lost in the thousands of projects available.


